
Replacing a bathroom vanity can completely transform the look and feel of your space. It’s a chance to upgrade not just the style but also the functionality of one of the most-used areas in your home. While it might seem like a big job, breaking it down into simple steps makes it manageable for any motivated homeowner.
If you’re thinking about an upgrade, a custom timber bathroom vanity is an excellent choice. A handcrafted piece adds warmth, character, and timeless appeal that you just can’t get from mass-produced alternatives. At Jarrimber, we believe a vanity should be both beautiful and built to last. Let’s walk through how you can make this upgrade happen.
Before You Start
A little bit of planning goes a long way. Before you begin, take a moment to think about bathroom vanity idea; the style, timber tone and overall look you’d like to achieve — it’ll help you choose a vanity that truly complements your bathroom. Once you’ve got a clear vision in mind, gather your tools and materials, and take careful measurements of your space to ensure your new vanity fits perfectly.
You should also take careful measurements of your space to ensure your new vanity will fit perfectly. Pay close attention to the height, width, and depth, and don’t forget to account for plumbing fixtures.
This is also the time to think about what is a bathroom vanity is in terms of style and function. Do you need more storage? A different basin style? Considering these details will help you choose or design a piece you’ll love for years.
A Step-by-Step Guide to Replacing Your Vanity
1. Remove the Old Vanity
First, turn off the water supply to the sink and disconnect the plumbing lines. You’ll also need to carefully cut the sealant around the countertop and backsplash with a utility knife. Once everything is disconnected, you can gently remove the old vanity from the wall.
2. Prepare the Space and Plumbing
With the old vanity out of the way, you can clean the area and make any necessary repairs to the wall or floor. This is the perfect time to give the wall a fresh coat of paint. Check that your plumbing lines up with your new vanity’s design and make adjustments if needed. If you’re switching from a floor-mounted unit to a wall-hung timber vanity, you might need to adjust pipe placement.
3. Pre-Treat and Protect Your Timber Vanity
If your new vanity is made from solid timber, it’s important to take a few extra steps before installation:
- Seal exposed edges: Any cut-outs for basins or plumbing should be sealed with a high-quality waterproof finish or timber sealant to protect against moisture.
- Check for even coating: Timber should be finished on all sides (including the underside and back) to prevent uneven absorption and warping.
- Use a finish made for wet areas — At Jarrimber, we use a high-performance acrylic finish that’s resistant to water and UV damage, designed specifically for bathroom environments.
These small details make a big difference in the longevity and look of your vanity.
4. Install the New Vanity
Carefully position your vanity against the wall and check that it’s level before securing it. Use quality fixings appropriate for your wall type (stud, brick, or concrete).
Once secure, fit the countertop and basin, reconnect the plumbing, and test for any leaks. Be gentle during tightening; overtightening can crack basins or damage the timber.
5. Seal and Finish for Longevity
Sealing is crucial, especially in a bathroom. Apply a quality silicone sealant around the edges where the vanity meets the wall and floor to prevent bathroom vanity water damage. If your timber vanity requires a final finish, make sure it’s one designed for wet areas to protect it from moisture.
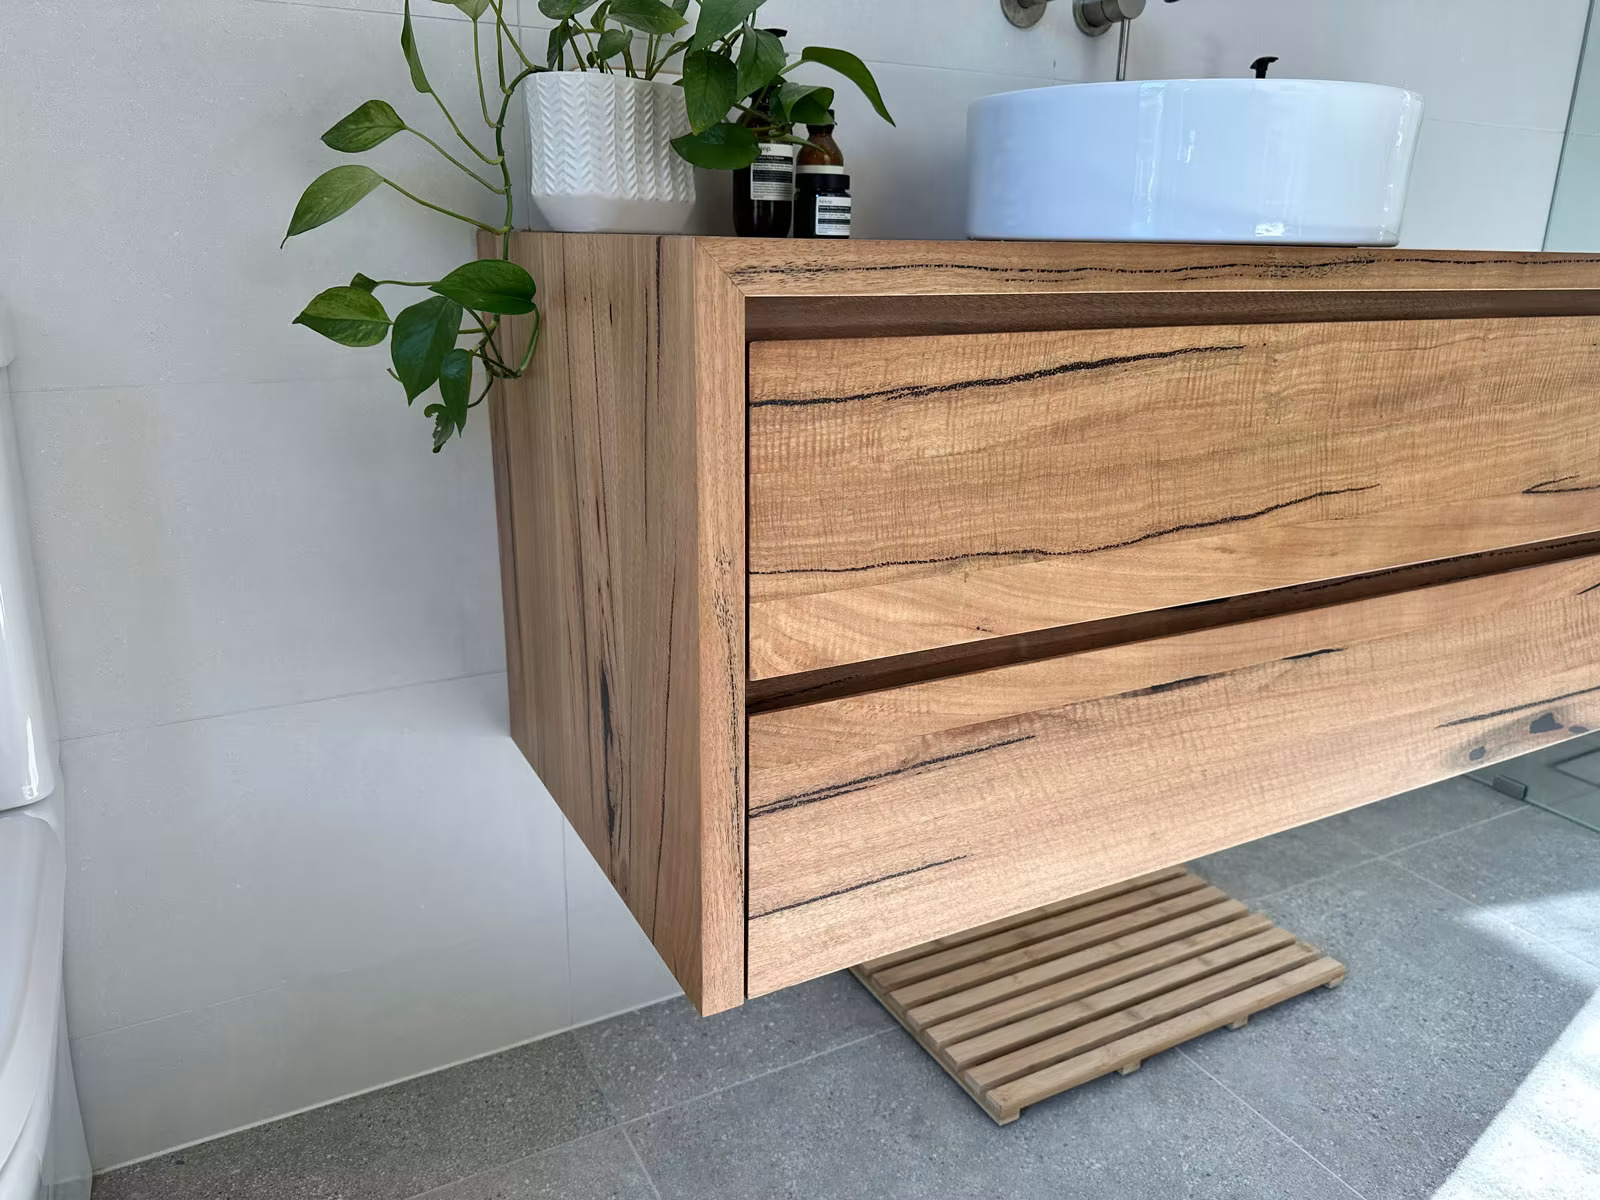
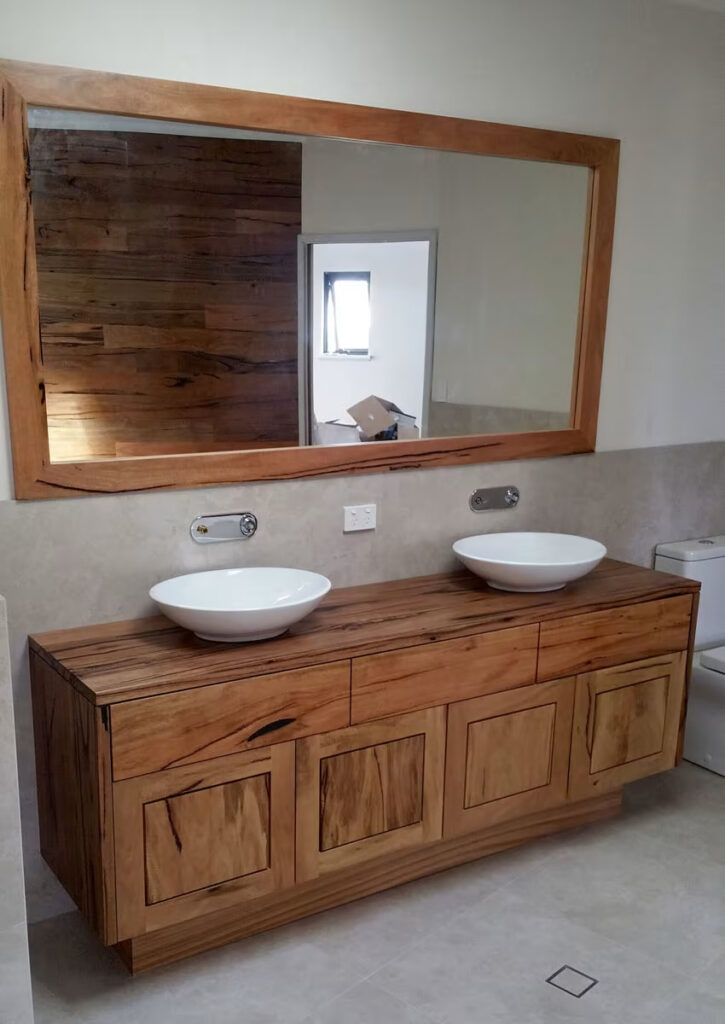
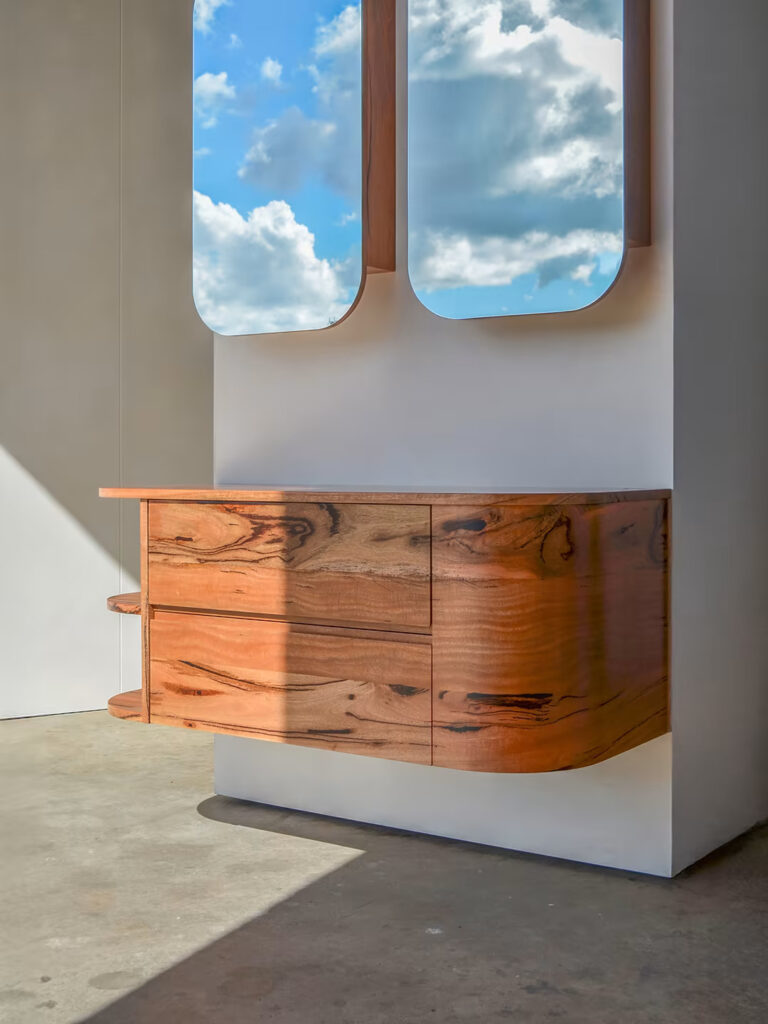
Why Choose a Timber Vanity from Jarrimber?
Choosing a timber vanity means investing in durability and natural beauty. At our Perth workshop, we handcraft each piece from premium Australian hardwoods like Jarrah, Marri, and Tasmanian Oak. These timbers aren’t just beautiful; they’re incredibly resilient.
Each vanity combines solid timber facades with moisture-resistant internal boards, finished in our signature hard-wearing acrylic coating. It’s a finish that not only enhances the timber’s natural grain but also protects it from daily wear, water, and UV exposure.
This ensures your vanity not only looks stunning but also stands up to daily use. Plus, because we make everything to order, whether you’re after a floating modern profile or a classic freestanding design, we can create a piece that perfectly fits your space and style.
Caring for Your Timber Vanity
Maintaining your timber vanity is simple. A good finish is your first line of defence. For daily cleaning, a soft, damp cloth is all you need. Avoid harsh chemical cleaners, as they can damage the timber’s protective layer. You can find more detailed advice on how to clean your solid timber bathroom vanity. With a little care, your timber vanity will retain its beauty for a lifetime.
Ready to Upgrade Your Space?
A well-designed bathroom vanity does more than hold a basin; it anchors the space with warmth and craftsmanship. If you’re ready to invest in a custom-made timber vanity that’s built for beauty and longevity, we’d love to help.
At Jarrimber, we design and handcraft every piece with care, using the best of Australian hardwoods and years of experience behind every joint and finish.
Get in touch to start the conversation. We’re always happy to talk timber, design, and how we can bring your bathroom vision to life.